Hardware Setup#
The following instructions will guide you through the setup and configuration of your Stb-tester Node. If you need any help, please contact us at support@stb-tester.com.
Physical connections#
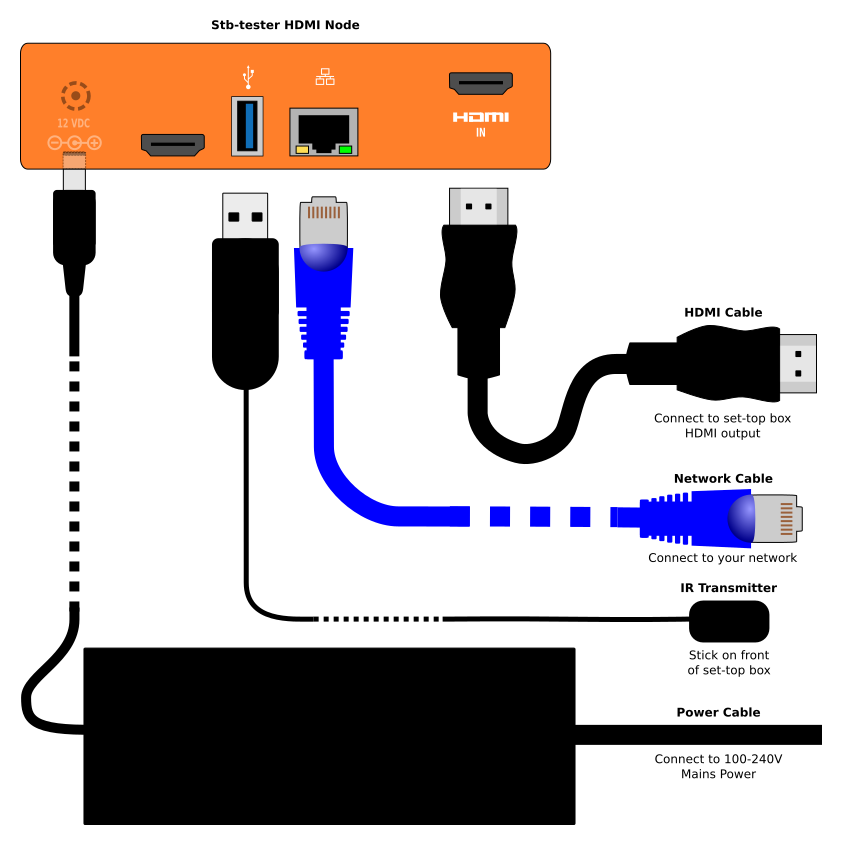
Connect the Stb-tester Node as per the above diagram.
The network must allow HTTPS access to the Stb-tester Portal on the internet. It doesn’t need to be the same network that the set-top box is on.
The infrared transmitter is self-adhesive; stick it over the set-top box’s IR receiver. This is a low-power transmitter (to avoid interfering with other set-top boxes in your test farm) so it has to be close against the IR receiver. Some set-top boxes are very sensitive to the placement of the transmitter; using a torch (flashlight) can help to find the position of the IR receiver behind the set-top box’s plastic case.
HDMI CEC control#
If you are testing an Apple TV, Fire TV, PS3, PS4, or any other device without an infrared receiver, don’t use our USB infrared transmitter. Instead, we have supplied a CEC adapter with a USB connector and two HDMI sockets. Put the adapter in the HDMI path between Stb-tester’s HDMI input and the device-under-test’s HDMI output, as per the diagram below.
To enable CEC on the device-under-test see Remote Control Configuration.

View your device in the Portal#
Go to the Stb-tester Portal in your web browser, and verify that:
You can see the live video from the device-under-test.
You can control the device-under-test using the on-screen remote control.
Troubleshooting#
If your Stb-tester Node appears “offline” in the portal, it may not have sufficient network access to reach the portal. See our Troubleshooting page for help.