PyCharm#
Quick summary for Python experts:
Install Python 3.10 (this version matches the Python version on the Stb-tester Node from Stb-tester v33 onward).
Run
python stbt_rig.py setup. This creates a virtualenv under.venvand installs stb-tester and its dependencies. This enables code completion / IntelliSense, but it doesn’t allow running the test scripts locally (see the note in the first section below for details).Configure your IDE’s “Save” button to run
python -m stbt_rig -v snapshot. This syncs your local code to the Stb-tester Portal on a special “snapshot” branch — without affecting your local git checkout.Configure your IDE to sync & run a single test remotely (on your Stb-tester Node) when you click “Run Test” from the IDE.
For more details, read on.
IntelliSense for stbt APIs#
Run the following command to create a virtual environment and install stb-tester into it:
python stbt_rig.py setup
Note
This package doesn’t include video-capture infrastructure and other complex dependencies, so it won’t allow you to run your test scripts locally (on your PC). It does enable your IDE’s “IntelliSense” or “Code Insight” features such as code completion, type inference, inline documentation, and linting.
Sync the code from your IDE to the Stb-tester Portal#
Bind the “Save” button of your IDE to run python -m stbt_rig -v snapshot
after saving. This will push your local code to the Stb-tester Portal on a
special branch called “<your username>’s snapshot” that is only visible to you.
It doesn’t affect your local git checkout (it doesn’t make any commits on your
checked-out branch) so after you have tested your changes & got them working,
you still need to do “git commit” and “git push” to make it official.
Before setting this up in your IDE, make sure that you can run python -m
stbt_rig -v snapshot from your terminal, to debug any authentication issues.
See stbt_rig installation and stbt_rig authentication here.
In Preferences > Plugins install the File Watchers plugin.
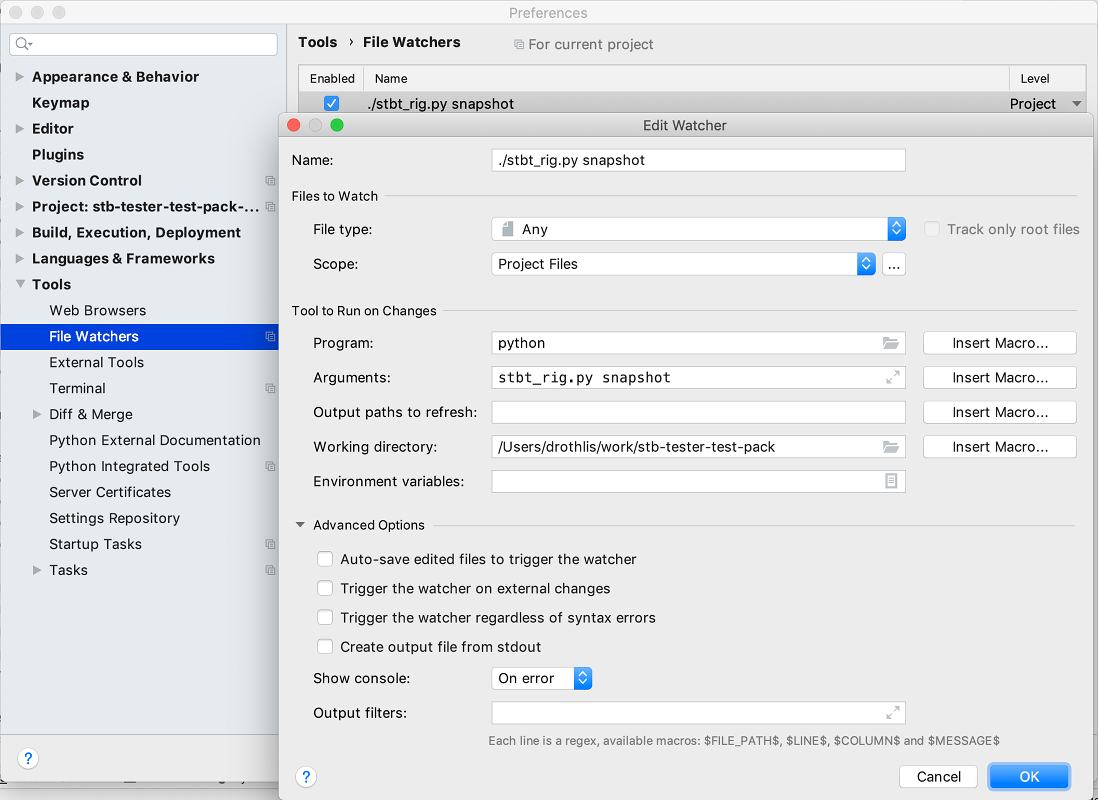
Now in Preferences > Tools > File Watchers add a new watcher with the following settings:
Name: stbt_rig snapshot
File type: Any
Scope: Project Files
Program:
pythonArguments:
-m stbt_rig -v snapshotWorking directory: path to your test-pack checkout

Run a test from your IDE#
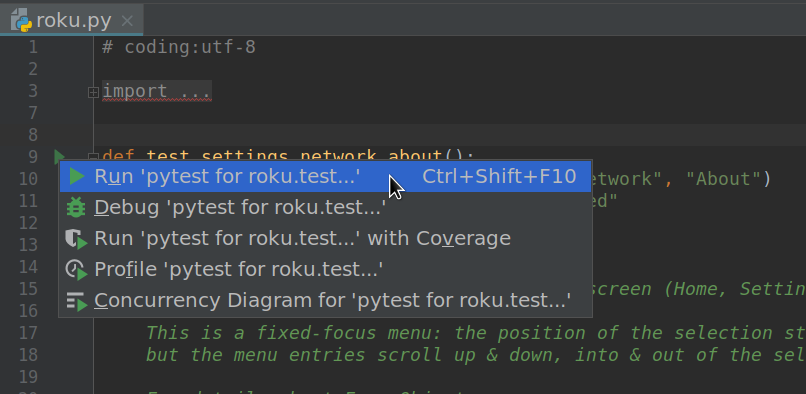
PyCharm can detect the test functions in a file and show a small button to run the test:

With the configuration below, clicking the button will sync your local code-changes and run the test remotely (on your Stb-tester Node). This is useful during test-development, when you are writing or debugging the test.
Before setting this up in your IDE, make sure that you can run python -m
stbt_rig -v snapshot from your terminal, to debug any authentication issues.
See stbt_rig installation and stbt_rig authentication here.
First go to File > Settings and select Tools > Python Integrated Tools. Under Testing: Default test runner select pytest. Click OK.
Next, go to Run > Edit Configurations and select Templates > Python tests > pytest. Fill in the following settings:
Target: Module name
Additional Arguments:
-p stbt_rig --node-id=stb-tester-abcdef123456Add content roots to PYTHONPATH: True
(Change “stb-tester-abcdef123456” to the actual ID of your Stb-tester Node.)
Note that you aren’t creating a new configuration (don’t click the little “+” icon on the left-hand pane). You are editing the Template from which PyCharm creates new configurations on the fly for each test.
The configuration should now look like:

You can now run the current test with Ctrl-Shift-F10 or by clicking the green play button in the margin on the left and selecting “Run ‘pytest for …’”:

Troubleshooting#
Make sure you have the latest version of stbt_rig.py. You can update the
stbt_rig.py in your test-pack by downloading the latest version from
<https://github.com/stb-tester/stbt-rig>.
Then re-run python stbt_rig.py setup.
If PyCharm still can’t find the stbt APIs, make sure that PyCharm is using
the same virtualenv that stbt_rig created (that is, a folder called
.venv in your test-pack checkout). Go to File > Settings > Project >
Project Interpreter. In the screenshot below we have configured it to use
Python from the project’s .venv folder:
