Configuration Reference#
Configuration files#
Configuration of the Stb-tester Nodes in your test farm is done by modifying the following files in the test-pack git repository.
.stbt.conf: An “ini” format file that configures your test farm and the run-time environment in which testcases are executed. See .stbt.conf below.
config/test-farm/<node-id>.conf (optional): Allows overriding configuration values for a specific Stb-tester Node in your test farm. See Node-specific configuration files below.
config/remote-control/: Files in this directory define the available remote controls. The Stb-tester Support team manages these files — if your device’s remote control is missing, contact <support@stb-tester.com>.
<name>.lircd.conf: A file describing the infrared protocol, in LIRC format.
<name>.svg (optional): See Custom remote control image.
config/setup/setup: An optional script to perform custom configuration of the environment in which your testcases are run. See Customising the test-run environment.
.stbt.conf#
The file .stbt.conf in the root of your test-pack is a configuration file
in the “ini” format that specifies
the run-time environment in which testcases are executed.
By default this file is a symlink to config/stbt.conf.
[test_pack]
stbt_version = 34
default_remote_control = XBox
portal_url = https://yourcompanyname.stb-tester.com

[ocr]
lang = eng+spa
test_pack.stbt_version specifies the version of the stbt Python API that your testcases use. This pins the test execution environment to a specific version of the stbt core Python API.
This allows you to manage upgrades of the stbt core Python API in a controlled manner, and to test the upgrade (by changing this setting in a branch of the test-pack git repo before committing it to the master branch). See the Python API Release Notes for the differences between each version.
Allowed values:
34
33
32
test_pack.portal_url specifes the URL of the portal this test-pack is associated with. This is used by the stbt_rig Command-Line Tool to know which portal to talk to. You shouldn’t need to modify this value.
Example:
portal_url = https://yourcompanyname.stb-tester.com.
test_pack.watchdog_timeout limits the maximum time spent running any single testcase. If a test-run takes longer than this value it will be stopped and the result will be recorded as an error.
This can be useful to make soak tests robust against deadlocks or infinite loops in your test scripts.
This duration can be specified with units, for example “2hr 30min”. If no units are specified it is assumed to be in seconds. The following time units are understood:
seconds, second, sec, s
minutes, minute, min, m
hours, hour, hr, h
A value of
0means the watchdog will be disabled and the only limit on test-run time will be disk-space for the test artifacts. This is the default.
test_pack.node_label_format allows customising the name of each Stb-tester Node in the Stb-tester Portal web interface. This is a format string that takes placeholders for other configuration values (which are read from the Node-specific configuration files). For example:
node_label_format = {node.datacenter} {device_profile.device_type} {device_profile.country}
If this isn’t specified, the default behaviour is to show the node.friendly_name config value.
ocr.lang specifies the default language used by
stbt.ocrandstbt.match_text. For the allowed values see the API documentation forstbt.ocr. To install additional language packs see Installing language packs.
Node-specific configuration files#
You can configure individual Stb-tester Nodes by creating the file config/test-farm/<node-id>.conf (for example config/test-farm/stb-tester-abcdef123456.conf). The Node ID is labelled on the physical Stb-tester Node, and it is also shown in the Stb-tester Portal.
[node]
friendly_name = PS4

[test_pack]
default_remote_control = ps4

[device_under_test]
device_type = ps4
ip_address = 192.168.1.7
power_outlet = myoutlet

[power_outlet myoutlet]
type = aten
address = 192.168.1.10
community = public
outlet = 1
node.friendly_name specifies a name for displaying in the portal. This makes it easier to identify each Stb-tester Node. You can use it to describe the device-under-test that it’s connected to (for example “Roku” or “PS4”) or a physical location (for example “Rack 3 Shelf 2”). If you need more flexibility use test_pack.node_label_format instead.
device_under_test.device_type: A name like “appletv”, “ps4”, or “roku”. Useful when you are re-using the same test scripts on several different devices, and they need to behave differently based on the type of device (for example, to launch your app requires a different sequence of actions on Apple TV vs. Roku). See How to structure your test scripts for re-use across multiple platforms.
device_under_test.ip_address: Used by the
stbt.android.AdbDeviceandstbt.RokuAPIs, and the Roku HTTP remote control.
device_under_test.power_outlet: See Power Distribution Units.
power_outlet *: See Power Distribution Units.
test_pack.default_remote_control specifies which remote control will be selected by default in the web interface, and in the run_tests REST API if you don’t specify
remote_control. This is most useful in node-specific config files, when you have different stb-tester nodes connected to different models of set-top boxes.For example if you have an infrared configuration file at
config/remote-control/XBox.lircd.conf, here you would specifydefault_remote_control = XBox.The special value
roku_httpenables Roku’s HTTP protocol for controlling Roku models that don’t have an infrared receiver. See Device Configuration: Roku.
Reading configuration values in your test scripts#
You can store your own custom configuration values in the .stbt.conf and config/test-farm/<node-id>.conf files. Please use a different section name (not [test_pack]) to avoid clashes with configuration keys that we might add in the future. For example:
[my_company_name]
backend_ip = 192.168.1.23
Then you can access this configuration value in your test scripts by using
stbt.get_config. For example, you might use something like this to download
a data-feed from your backend server:
backend_ip = stbt.get_config("my_company_name", "backend_ip")
print(requests.get(f"http://{backend_ip}/feed.json").text)
Storing passwords and other secrets#
If your test-script needs a password at run-time (for example to connect to some backend service) you can store that password in git, encrypted so that humans with access to test-pack git repo won’t know the real password. When you run a test, the password will be available to test-scripts running on the Stb-tester Node, unencrypted.
Warning
Anyone with write access to the test-pack will be able to extract the passwords stored in this way, for example by writing and running a test-script that writes the password to a file and then downloading that file. (If that does happen, there will be an audit trail because all tests executed on an Stb-tester Node are version-controlled.)
This mechanism protects against the following scenarios:
Accidental leakage.
Users with read-only access to the git repo.
Users who once had access to the git repo, but don’t have access now.
These passwords are stored in .stbt.conf in the section
[encrypted_secrets]. To encrypt your secret value, use the “Add new secret”
form in the admin page of the Stb-tester Portal. The Portal will push a git
commit with the new configuration value.

To access the unencrypted value in your test-script:
stbt.get_config("secrets", "your_secret_name")
Automatic configuration keys#
Stb-tester sets some configuration keys at run-time to expose information about
the environment in which the tests are being run. You can then retrieve this
information during the test-run using the stbt.get_config Python API. These
are set automatically and you should not set these values in your
configuration file.
node.node_id is the id of the node that the test is currently being run on, e.g.
stb-tester-abcdef123456.
node.portal_url is the url of the portal that the test is currently being run on, e.g.
https://customer.stb-tester.com. This will usually have the same value astest_pack.portal_url- but it is set automatically during a test-run rather than recorded in the configuration file itself.
The following config values mirror the return type from the /api/v2/results/(result_id) REST API. See the documentation there for reference.
result.result_id
result.job_category
result.job_uid
result.result_url
result.triage_url
result.start_time
result.test_case
result.test_pack_branch
result.test_pack_sha
result.username
result.tags.<tagname> - Use
get_config("result.tags", "tagname")to retrieve the value of a tag passed to the /api/v2/run_tests REST API endpoint when starting the test job. This provides a mechanism for passing parameters to tests.
The following config values mirror the return type from the /api/v2/jobs/(job_uid) REST API. See the documentation there for reference:
job.job_uid
job.job_url
job.start_time
Customising the test-run environment#
If your test-pack contains a script called config/setup/setup, Stb-tester
will run it to set up the test environment on the Stb-tester Node. This script
can use sudo apt install to install Ubuntu packages, or sudo pip3
install to install Python packages from PyPI. After the Stb-tester Node has
created the environment, each test-job will run in a pristine copy of that
environment.
Caching#
The environment is built by running your
config/setup/setupscript when you run a test.Once the environment is built, it is cached on the Stb-tester Node so that you don’t need to re-build it before every test-run.
The cached environment is deleted when the Stb-tester Node is powered off. After a reboot, it will be built the first time you run a test.
If you change the setup script (either by pushing a new commit or by switching to a branch with a different setup script) then a new environment will be built when you run a test (and the previous cached environment will be deleted).
Avoid having different versions of the setup script on different branches, to avoid long re-builds when switching branches, and because background tasks such as lint jobs can only run on Stb-tester Nodes that have the right environment already built.
How the setup script is run#
When the setup script is run it won’t have access to the other files in the test-pack. It will be installed into
/var/lib/stbt/test-pack/config/setup/setupand executed from the working directory/var/lib/stbt/test-pack.The setup script will be run in a vanilla Ubuntu 22.04 environment with stb-tester installed. The stb-tester version is determined by test_pack.stbt_version in .stbt.conf.
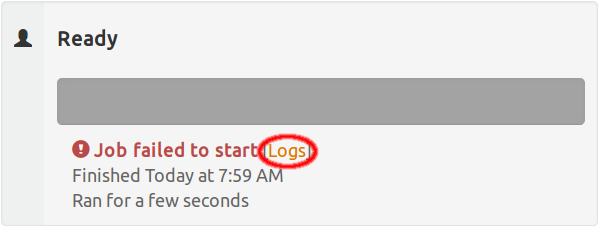
If the setup script fails, no tests will be run. To see the output from the setup script click the “Logs” link.
Reproducible builds#
Running the same setup script should always result in the same output. It is your responsibility to ensure this, by taking care when writing the setup script.
If you install any packages with
pip3, specify the version to install. For example:sudo pip3 install testrail-api==1.11.0
The setup script must return a non-zero exit status if it fails to set up the environment correctly. If it is a shell script, use set -e so that it will exit immediately if any of the commands fail.
Example#
Save the following file into your test-pack as config/setup/setup (create
the config/setup/ directory if it doesn’t already exist):
#!/bin/bash -ex
# Install Ubuntu packages
sudo apt update
sudo apt install -y \
python3-paramiko \
socat
# Install Python packages from PyPI
sudo pip3 install testrail-api==1.11.0
Commit and push your change:
git add config/setup/setup
git commit
git push
Now the first time you run a test, the setup script will be run to create the
test environment and you will be able to import paramiko in your Python
test-scripts.