Git Workflow#
When you are developing new test scripts (or modifying existing ones) we recommend this workflow:
Make your changes on a branch#
Using a git branch means that you can change existing test scripts and helper functions without breaking the tests for other users. Then, once you have it working you can merge your changes to the main branch so that everyone starts using your new tests or your new fixes (merging to main is the final step in our workflow, below).
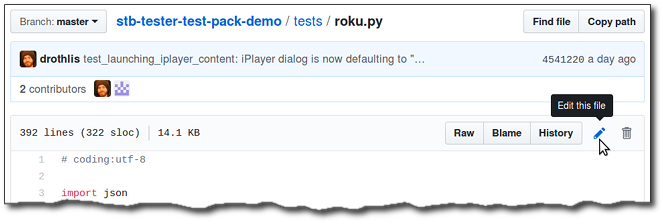
If you aren’t familiar with git, you can edit the files in your test-pack from GitHub’s web interface:
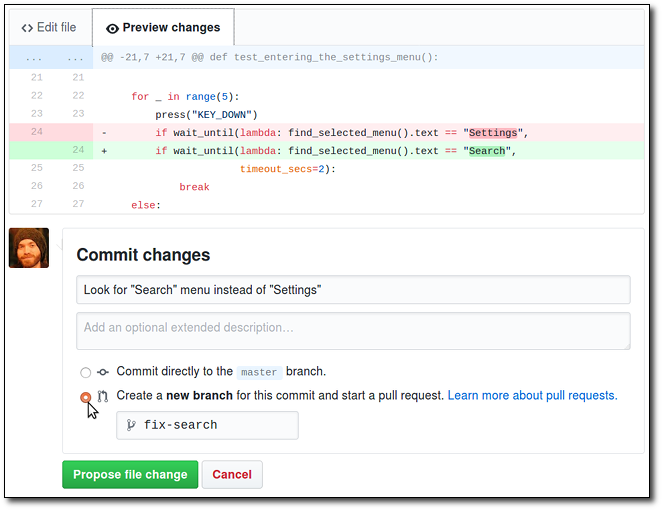
Then, when you’re saving your changes select “Create a new branch for this commit”:
For more information about git branches, see this guide written by our friends at GitHub: Understanding the GitHub Flow.
Test your branch#
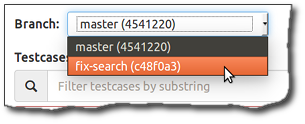
In the Stb-tester Portal you can run a test from the branch you just made:
Keep committing changes to your branch until you have got it working to your satisfaction.
Tip: Test your local changes using stbt_rig#
This section assumes that you have used git clone to work on the test-pack files locally (on your PC). A tutorial on using Git is outside the scope of this document; see <https://git-scm.com> for that.
Debugging your test scripts can get tedious if you have to make a git commit for every change you want to test. stbt_rig is a command-line tool that can run your local code-changes on an Stb-tester Node without having to make git commits or clicking in the web portal.
For example run this on your PC from your test-pack directory:
stbt_rig --node-id=stb-tester-abcdef123456 run tests/file.py::test_name
This will automatically do the following steps:
Commit a snapshot of your changes to a temporary git branch and push it to GitHub;
Run the test via the Stb-tester Portal’s REST API;
Grab the result and print the output locally.
This saves you a multi-step manual process, and it removes the need to make lots of tiny git commits while iterating on test-scripts. Once you get your test-script working, you still need to make a git commit to share your changes with the rest of your team.
For more details see stbt_rig Command-Line Tool.
Make a pull request#
Once your changes are committed on a git branch, you can create a Pull Request for your branch by clicking “New pull request” in the GitHub web interface.
Pull requests are a formal process for asking your team-members to review your changes. They provide a central place (in the GitHub web interface) for tracking discussions about your code.
As a bonus, Stb-tester will automatically run a static analysis of the code
in your pull request. This can catch common issues like syntax errors, some
logic errors, and failure to comply with your team’s coding style. Stb-tester
posts the result as a green tick  or red cross
  on your
pull request. Click the red cross to see a log with details of the failures.
on your
pull request. Click the red cross to see a log with details of the failures.

It is a good idea to set up a Continuous Integration server that will run your test-scripts automatically for each pull request. This can help catch unintended bugs, if a change you made to fix one test unexpectedly changed the behaviour of other tests (for example if you were changing a common helper function).
Merge to main#
Once your changes have been tested (ideally automatically) and reviewed (by your peers) you can merge them to the main branch by clicking the “Merge” button in your pull request on GitHub.
When you want to test your set-top box or your app, run your tests from the main branch. If your team follows this workflow, the tests on main won’t be broken because of someone’s experimental change or work-in-progress.