Record your remote control configuration#
Stb-tester needs to know the infrared protocol that your device-under-test understands. If you are testing a common device like a Roku, Apple TV, or XBox, we can provide a configuration file that describes the remote-control’s infrared protocol.
If the device is your own set-top box, we will need to record the infrared protocol of your remote-control for you. Please post us your remote-control unit – contact support@stb-tester.com for details.
If you have a RedRat infrared receiver you can record the infrared protocol yourself by following the instructions below.
Using a RedRat infrared receiver#

To record your remote control’s infrared protocol using a RedRat infrared receiver you will need a Windows PC and the USB Infrared Receiver from RedRat.
Download the “RedRat IR Signal Database Utility” and install it on your Windows PC by following RedRat’s instructions.
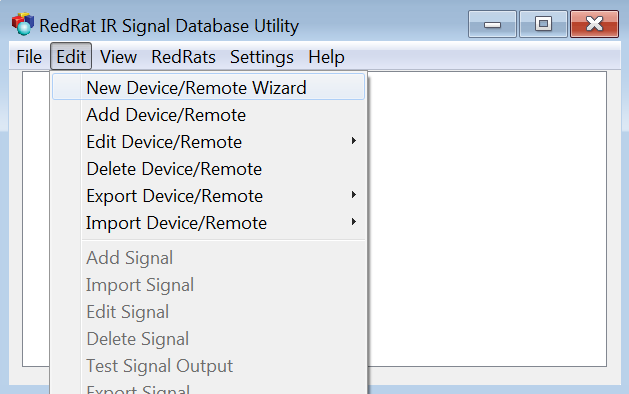
Connect the USB Infrared Receiver to your Windows PC and run the RedRat IR Signal Database Utility. Select Edit > New Device/Remote Wizard.
Follow the instructions in the Wizard to record the infrared configuration for your device.
When the Wizard asks you to press a button, press the button firmly but quickly. This is so that it doesn’t record a longer signal; when you play back a single button-press during a test, you don’t want it to look like a double press.
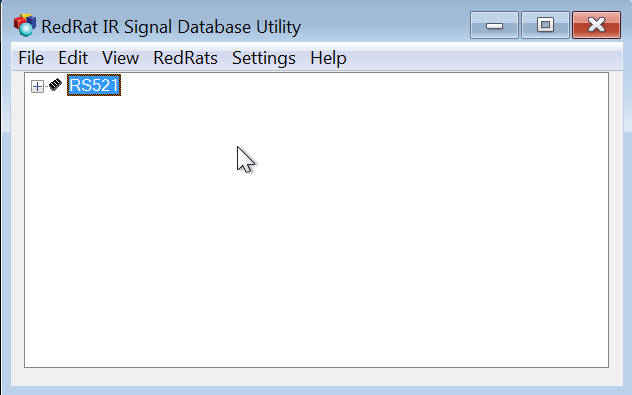
When you have finished, select your device in the RedRat window:
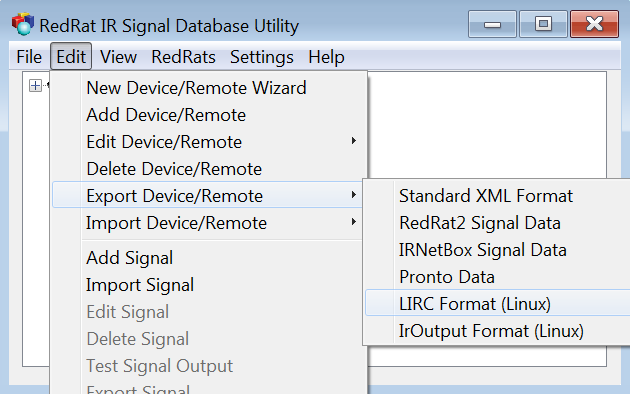
Select Edit > Export Device/Remote > LIRC Format (Linux).
Save the file, then copy it to your test-pack git repository
as config/remote-control/<name>.lircd.conf (where <name> is any name to
identify the remote-control or the set-top box).
We recommend that you name the remote-control buttons to match the Linux
input-event-codes.h
key names. You can change the names by editing the <name>.lircd.conf file.
For example, instead of “0” use “KEY_0”:
KEY_0
KEY_1
KEY_2
KEY_3
KEY_4
KEY_5
KEY_6
KEY_7
KEY_8
KEY_9
KEY_AUDIO
KEY_BACK
KEY_BLUE
KEY_CHANNELDOWN
KEY_CHANNELUP
KEY_CLOSE
KEY_DOWN
KEY_EPG
KEY_FASTFORWARD
KEY_GREEN
KEY_HOME
KEY_INFO
KEY_LEFT
KEY_MENU
KEY_MUTE
KEY_NEXT
KEY_OK
KEY_PAUSE
KEY_PLAY
KEY_POWER
KEY_PREVIOUS
KEY_RECORD
KEY_RED
KEY_REWIND
KEY_RIGHT
KEY_STOP
KEY_SUBTITLE
KEY_TV
KEY_UP
KEY_VOLUMEDOWN
KEY_VOLUMEUP
KEY_YELLOW
KEY_ZOOM
Commit and push your changes#
Commit the new or changed file to your git repository:
git add config/remote-control/<name>.lircd.conf
git commit
And push your change to the upstream repository on GitHub:
git push
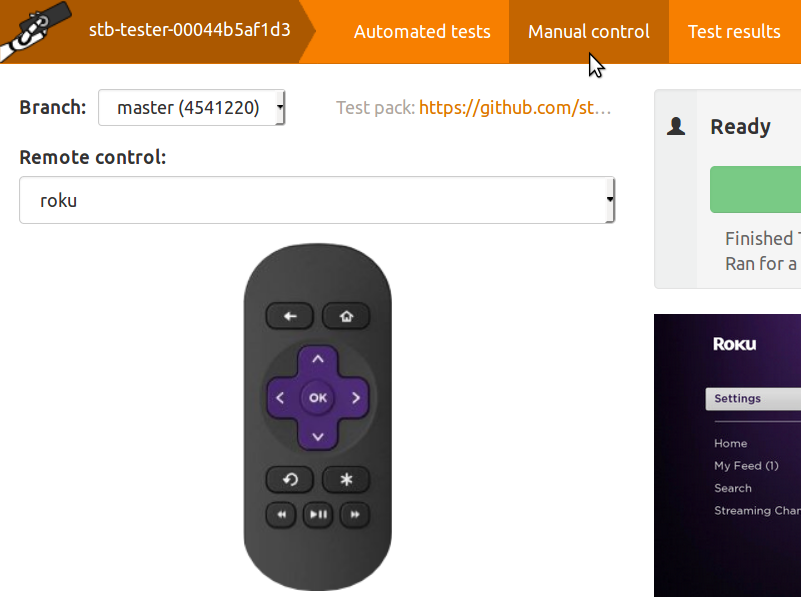
Test your new infrared configuration by going to the Manual control tab of the Stb-tester portal: